An ostomy bag leak can turn an ordinary morning into a stressful, messy experience. Moisture may spread under the wafer, clothing can become stained, and your skin may feel sore within hours. If you have searched, “Why is my ostomy bag leaking,” you are not alone. Leaks are common, but they should not be ignored or accepted as unavoidable.
This guide explains practical ways to reduce leakage and protect the skin around your stoma. The fit of the opening matters. A gap of only a few millimeters can allow output beneath the adhesive. Uneven skin, surgical scars, body movement, sweating, and a full pouch can also weaken the seal. Checking the appliance in a mirror may reveal a small lifted edge before a major leak occurs. Small details matter.
Empty the pouch when it reaches about one-third full, and clean the surrounding skin gently before applying a new barrier. The skin should be completely dry. Avoid adding creams or oils unless a stoma care professional recommends them, because they may prevent adhesion. Barrier rings, strips, convex systems, or support belts can help some people, but the best choice depends on your stoma and skin shape.
There is no perfect setup for everyone. I have learned that even careful routines sometimes need adjustment. Repeated leaks, bleeding, painful skin, or sudden changes in output deserve professional attention. A certified ostomy nurse or healthcare provider can assess the fit and suggest safer, more personalized solutions.
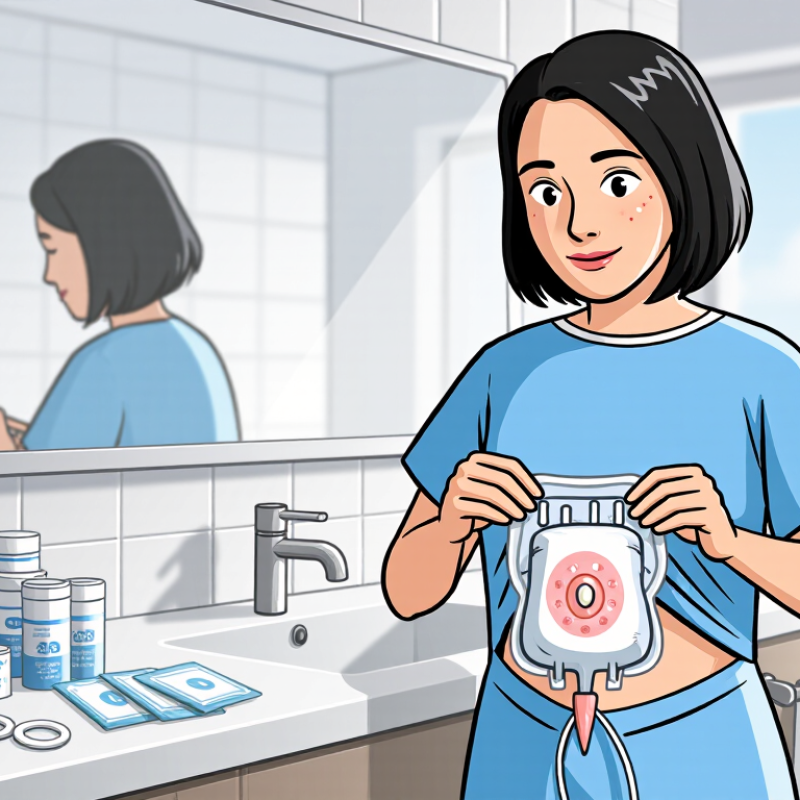
An ostomy bag usually leaks when the skin barrier cannot maintain a complete seal. The most common reason is an incorrect opening size. If it is too large, output may touch the surrounding skin. If it is too tight, pressure can irritate the stoma and weaken adhesion. The stoma may also change size during the first weeks after surgery.
Skin condition matters. Moisture, wrinkles, body hair, and leftover adhesive can create tiny channels beneath the barrier. Uneven scars, a crease near the stoma, or a bulge from a hernia may also prevent a flat seal. Heavy or watery output can move quickly and overwhelm the pouch system. Gas and overfilling add pressure. Even careful routines can fail.
It is easy to assume every leak means poor application. That is not always true. A barrier may have been fitted well yesterday but fail after sweating, exercise, illness, or weight change. Check where the leak begins, not only where it appears. Repeated leakage near one edge may reveal a body contour problem. Clean and dry the skin gently, then reassess the opening and seal. Do not keep adding layers over irritated skin. An ostomy nurse can measure the stoma and observe your changing position. Seek clinical advice if leakage continues, the skin becomes painful, or the stoma changes color or shape.
In practice, rushed skin preparation often causes preventable leaks. Gently remove the used pouch without pulling the skin. Clean around the stoma with warm water and a soft, lint-free cloth. Mild, unscented soap may be suitable, but rinse it completely. Avoid oils, moisturizers, and strongly scented products. They can weaken the seal. Pat the area dry. Do not rub. Even slight moisture can create a pathway for output.
Inspect the stoma and surrounding skin under good light. The stoma should look moist and pink to red. A small amount of bleeding during cleaning can occur, but persistent bleeding needs medical advice. Check for broken skin, swelling, unusual color, burning, or a spreading rash. These signs may need an ostomy nurse’s assessment. I still check twice, because a tiny irritated patch can become painful quickly.
Measure the stoma regularly, especially during the first weeks after surgery. Its size can change as swelling decreases. Cut the skin barrier opening close to the stoma, usually with only a narrow gap. It should not press against the stoma. If body hair prevents contact, carefully trim it with scissors. Avoid shaving, which may cause small cuts. Warm the barrier between your hands, place it smoothly, and hold gentle pressure for about one minute. Do not stretch the skin while applying it. A perfectly centered pouch is helpful, but comfort and skin condition matter too.
How to Stop Your Ostomy Bag from Leaking
Choosing the right ostomy barrier begins with your stoma, not the pouch. Measure the stoma regularly, especially during the first weeks after surgery. Its size may change as swelling decreases. The opening should usually sit about 1–2 millimeters larger than the stoma. Too wide exposes skin. Too tight may cause pressure and bleeding. A paper measuring guide can help, but it is easy to cut inaccurately. Check the fit against a mirror.
Clean the surrounding skin with warm water, then dry it completely. Oils, lotion, and moisture can weaken the seal. Press the barrier gently around the stoma for 30–60 seconds. Body warmth helps it bond. Uneven skin, scars, folds, or a recessed stoma may require a molded ring, paste, or a convex barrier. These products should match your anatomy, not hide a poor fit. A convex option can create pressure, so ask an ostomy nurse to assess it when possible.
Watch for warning signs. Burning, itching, redness, or a sour odor may signal leakage beneath the barrier. Do not wait until the pouch is full. Inspect the edge when output becomes loose or unusually frequent. If leaks continue, record the timing, food intake, movement, and skin condition. Patterns can reveal the cause. Fitting is not always perfect. A certified ostomy nurse can review your technique and suggest a safer adjustment, particularly when the stoma changes shape or the skin breaks down.
A skin barrier opening should fit closely around the stoma without pressing on it. A commonly recommended target is approximately 3 mm (about 1/8 inch) larger than the measured stoma diameter. The values below show the target opening calculated for different stoma sizes.
Measure the stoma regularly because its size can change, especially during the first weeks after surgery. A gap that is too large may expose the surrounding skin to output, while an opening that is too small may rub or injure the stoma. Follow the fitting instructions provided by your healthcare professional.
A secure ostomy pouch begins with careful skin preparation. Measure your stoma regularly, especially during the first weeks after surgery. Its size can change as swelling decreases. Cut the opening about 1–2 millimeters larger than the stoma. Too wide exposes skin, while too tight may cause pressure and injury.
Gently clean the skin with warm water, then pat it completely dry. Avoid oily creams unless your healthcare professional recommends them. Even a small amount of moisture can weaken the seal. Warm the adhesive between your hands before applying it. Center the opening over the stoma, then press the skin barrier firmly for 30–60 seconds. Pay attention to the lower edge, where output often collects. I sometimes found that rushing this step caused leaks later. That mistake is easy to repeat.
Tips: Check for wrinkles around the stoma. Smooth the barrier outward with your fingertips. Empty the pouch before it becomes one-third full. Inspect the seal after bathing or exercise. If the skin feels sore, itchy, or unusually wet, remove the pouch gently and reassess the fit. Persistent leakage deserves help from an ostomy nurse or clinician, even when the appliance looks correctly positioned.
| Step | What to Do | Why It Matters | Seal-Check Indicator |
|---|---|---|---|
| 1. Prepare the skin | Gently clean the skin around the stoma with warm water and dry it completely. Avoid leaving moisture, oils, or residue beneath the skin barrier. | A clean, dry surface helps the adhesive contact the skin and reduces pathways for output to travel underneath the barrier. | The skin feels dry and the barrier lies flat without sliding. |
| 2. Measure the stoma | Measure the stoma regularly, especially during the first weeks after surgery, because its size may change as swelling decreases. | An opening that is too large exposes surrounding skin; an opening that is too small may press against the stoma and cause discomfort or injury. | The opening fits closely around the stoma without pinching it. |
| 3. Cut or select the opening | Use the measured stoma size to prepare the skin-barrier opening according to the product instructions. Smooth any rough edges. | A smooth, close-fitting opening supports an even seal and minimizes exposed skin. | There are no visible gaps between the stoma and the inner edge of the barrier. |
| 4. Warm the adhesive | Warm the skin barrier between your hands for a short time before applying it. Do not use direct heat unless specifically advised by a clinician. | Gentle warmth can make the adhesive more flexible and help it conform to the skin. | The barrier bends comfortably and does not lift at the edges. |
| 5. Apply from the stoma outward | Center the opening over the stoma, place the barrier gently, and press outward from the area nearest the stoma toward the edges. | Applying from the center outward helps reduce wrinkles, folds, and trapped air. | The surface appears smooth, with no creases beneath the barrier. |
| 6. Hold gentle pressure | Use clean fingers to apply gentle, even pressure around the stoma and along the barrier edges for the time recommended in the product instructions. | Pressure helps the adhesive make full contact with the skin and improves the initial seal. | The barrier remains firmly attached when you release your fingers. |
| 7. Check the pouch connection | If using a two-piece system, confirm that the pouch is fully connected to the skin barrier. Check that the bottom closure is securely closed. | Leaks can occur at the pouch connection or outlet even when the skin barrier is sealed correctly. | The connection is even and secure, and the outlet is completely closed. |
| 8. Manage folds and body contours | If the skin has creases, scars, or uneven contours, discuss suitable seal-support products or fitting techniques with an ostomy nurse. | Uneven skin can create channels beneath the barrier where output may collect. | The barrier follows the skin contour without visible channels or lifted areas. |
| 9. Empty before it becomes heavy | Empty the pouch when it is about one-third to one-half full, or according to your care plan. | A heavy pouch can pull on the barrier and increase the chance of edge lifting. | The pouch remains light enough that it does not tug on the skin barrier. |
| 10. Inspect the seal regularly | Look for discoloration, itching, burning, soreness, odor, or output beneath the barrier. Replace the system if the seal is failing rather than simply covering the leak. | Early signs may indicate leakage or skin irritation that can worsen if left untreated. | The surrounding skin remains intact, comfortable, and free of output. |
Managing recurrent leaks starts with looking for a pattern, not simply adding more adhesive. Note when the leak occurs, such as after meals, exercise, bathing, or overnight. Check whether the opening fits closely around the stoma without pressing against it. A gap can allow output to reach the skin. Uneven skin, scars, sweating, or a stoma that sits below the skin may also weaken the seal. Clean the area gently, dry it fully, and avoid applying lotions beneath the barrier unless advised by a stoma specialist.
Skin changes matter. Redness, burning, weeping, or small open areas can make the next seal fail sooner. It is easy to blame the pouch, but the skin often gives an earlier warning. I have also seen people wait too long, hoping the problem will settle. That can make treatment harder. A wound, ostomy, and continence nurse can assess the stoma, measure its shape, and suggest changes in fit or routine. Keep a short leak diary before the appointment.
Seek medical advice when leaks keep returning despite careful adjustments, or when skin damage lasts more than a few days. Contact a clinician promptly for increasing pain, swelling, bleeding, fever, or pus. Urgent care is needed for severe cramps, repeated vomiting, faintness, or no output with abdominal swelling. Do not ignore sudden changes in stoma color. It may signal a serious problem.
Measure the stoma regularly, especially during the first weeks after surgery. The opening should usually be 1–2 millimeters wider than the stoma. Too wide exposes skin. Too tight may cause pressure or bleeding. Check the fit in a mirror.
Clean the surrounding skin with warm water. Dry it completely. Avoid oils, lotion, and moisture under the barrier. They can weaken the seal. Even a small damp area may cause trouble.
Press gently around the stoma for 30–60 seconds. Body warmth can improve bonding. Hold the edges flat. Do not rush this step.
Scars, folds, sweating, and recessed stomas can weaken the seal. A molded ring, paste, or convex barrier may help. The product should match your anatomy. It should not hide a poor fit. A convex option can create pressure, so seek professional guidance.
Burning, itching, redness, or a sour odor may signal leakage. Inspect the barrier edge when output becomes loose or unusually frequent. Do not wait until the pouch is full. Skin often warns you first.
Note the time and activity. Record meals, exercise, bathing, overnight leakage, and skin condition. A short leak diary can reveal patterns. I might blame the pouch too quickly. The fit or skin may be the real issue.
Seek help when leaks continue despite careful adjustments. A specialist can measure the stoma and review your technique. Ask for advice when the stoma changes shape. Get help if skin damage lasts more than a few days.
Contact a clinician for increasing pain, swelling, bleeding, fever, or pus. Urgent care is needed for severe cramps, repeated vomiting, faintness, or abdominal swelling without output. Seek prompt advice after a sudden stoma color change. Do not simply wait and hope.
Ostomy bag leaks can happen for several reasons, including an improperly sized opening, uneven skin, excessive moisture, a full pouch, or movement that loosens the seal. If you are wondering, “Why is my ostomy bag leaking,” begin by checking whether the skin around the stoma is clean, completely dry, and free from oils or residue. Gently measure the stoma and choose a barrier that fits closely without pressing against it. A suitable barrier should protect the surrounding skin while creating a smooth, secure surface.
When applying the pouch, warm the barrier slightly with your hands, center it carefully, and press around the stoma for several minutes to improve adhesion. Empty the pouch before it becomes too full and monitor activities that may cause pulling or sweating. Recurrent leaks, skin irritation, pain, bleeding, changes in stoma appearance, or difficulty maintaining a seal should be discussed with a qualified ostomy nurse or healthcare professional.

ProMix Medical